
Hii This tutorial is for how to change millisecond time to Date and also how to code a coupon Expiry and Expired date ....
Here is some steps to do this example:-
Step 1:- Add new project Open android studio go File - New- New project.. now open activity_main.xml and write following code:-

Here is some steps to do this example:-
Step 1:- Add new project Open android studio go File - New- New project.. now open activity_main.xml and write following code:-
<?xml version="1.0" encoding="utf-8"?>
<LinearLayout xmlns:android="http://schemas.android.com/apk/res/android"
xmlns:tools="http://schemas.android.com/tools"
android:layout_width="match_parent"
android:layout_height="match_parent"
android:orientation="vertical"
tools:context="com.example.supriyabharti.radiobuttonexmp.MainActivity">

<TextView
android:layout_width="match_parent"
android:layout_height="wrap_content"
android:layout_margin="20dp"
android:gravity="center"
android:text="Find Date Day difference Example" />

<RadioGroup
android:id="@+id/radioGroup"
android:layout_width="match_parent"
android:layout_height="wrap_content"
android:weightSum="2"
android:orientation="horizontal">
 <RadioButton
android:layout_width="wrap_content"
android:layout_height="wrap_content"
android:text="1518064675994"
android:layout_weight="1"
android:id="@+id/pastDate"/>
 <RadioButton
android:layout_width="wrap_content"
android:layout_height="wrap_content"
android:text="1545676200000"
android:layout_weight="1"
android:id="@+id/futureDate"/>
    </RadioGroup>

<View
android:layout_width="match_parent"
android:layout_height="2dp"
android:layout_marginTop="30dp"
android:background="@color/inactive"/>
<LinearLayout
android:layout_width="match_parent"
android:layout_height="100dp"
android:layout_margin="30dp"
android:layout_marginTop="30dp"
android:orientation="vertical">
<TextView
android:layout_width="match_parent"
android:layout_height="wrap_content"
android:text="Fashion Coupon"
android:textStyle="bold"
android:gravity="center"/>
<TextView
android:id="@+id/expireDate"
android:layout_width="match_parent"
android:layout_height="wrap_content"
android:text="Expire on"
android:gravity="center"/>
<TextView
android:id="@+id/expireDayLeft"
android:layout_width="match_parent"
android:layout_height="wrap_content"
android:text="Day Left"
android:gravity="center"/>
    </LinearLayout>

</LinearLayout>
Step 2:-Open MainActivity.java class and write following code:-
public class MainActivity extends AppCompatActivity {
    RadioButton pastDate,futureDate;
    RadioGroup radioGroup;
    TextView expireDate,expireDayLeft;

    @Override
    protected void onCreate(Bundle savedInstanceState) {
        super.onCreate(savedInstanceState);
        setContentView(R.layout.activity_main);
        pastDate=(RadioButton)findViewById(R.id.pastDate);
        futureDate=(RadioButton)findViewById(R.id.futureDate);
        radioGroup=(RadioGroup) findViewById(R.id.radioGroup);
        expireDate=(TextView) findViewById(R.id.expireDate);
        expireDayLeft=(TextView) findViewById(R.id.expireDayLeft);

        radioGroup.setOnCheckedChangeListener(new RadioGroup.OnCheckedChangeListener() {
            @Override
            public void onCheckedChanged(RadioGroup group, int checkedId) {
                switch (checkedId){
                    case R.id.pastDate:
                        long selectedDate=Long.parseLong(pastDate.getText().toString());
                        SetDataToView(selectedDate);
                        break;
                    case R.id.futureDate:
                        selectedDate=Long.parseLong(futureDate.getText().toString());
                        SetDataToView(selectedDate);
                        break;
                }
            }
        });
    }
    //method to change ui according to selection
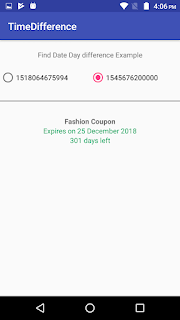
        public void SetDataToView(long selectedBtnId){
        long dateInMiliSecond=selectedBtnId;
        Date date1=new Date(dateInMiliSecond);
        Date date2=new Date(System.currentTimeMillis());
        long diffInDays=date1.getTime() - date2.getTime();
        int days = (int) Math.abs(TimeUnit.DAYS.convert(diffInDays, TimeUnit.MILLISECONDS));

        SimpleDateFormat simpleDateFormat=new SimpleDateFormat(" d "+"MMMM "+"yyyy");
        if(dateInMiliSecond>=System.currentTimeMillis()){
            expireDayLeft.setVisibility(View.VISIBLE);
            expireDate.setText("Expires on"+simpleDateFormat.format(dateInMiliSecond));
            expireDate.setTextColor(getResources().getColor(R.color.green));
            expireDayLeft.setText(days+" "+"days left");
            expireDayLeft.setTextColor(getResources().getColor(R.color.green));

        }else if(dateInMiliSecond< System.currentTimeMillis()){
            expireDate.setText("Expired on"+simpleDateFormat.format(dateInMiliSecond));
            expireDate.setTextColor(getResources().getColor(R.color.red));
            expireDayLeft.setVisibility(View.GONE);
        }

    }
}
Step 3:-Screen Shots are following:-


No comments:
Post a Comment